This laborious part only resulted in the black portion of the canard below. This post will cover the teal highlighted areas: the elevators and wingtips.
Elevators are the control surfaces which alter the pitch of an aircraft. You wouldn't get much flying done without them, so they're pretty important.
To start out, Ced drilled holes in the required areas on the torque tubes in order to pop rivet hinge inserts in place.
A lot of documentation was skipped, so here's a quick rundown of what happened next. With the hinge inserts placed inside the torque tubes, the tubes were ready to be bonded into the elevator cores. These cores were ordered from Eureka CNC to save time and have precise cores. When bonding the tube inside the core, you have to make sure the tube is at the correct angle in relation to the core. I did not participate in this step, but I'm sure it was stressful.
After that bond cured, it was time to glass the foam. Since these cores are relatively small, Ced opted for a one-shot glass layup instead of the two part layup specified. The elevators turned out well and saved a day of work and cure time.
After the glass cured, the hinge slots were cleared of glass.
And the ends of the elevators were capped.
More stressful measuring and drilling ensued in order to mount a piece of hardware lovingly referred to as the "torque tube offset."
After the offsets were installed, it was time to match up the elevator to the canard in order to mark the slots that needed to be cut into the canard for the hinges.
See those L-shaped hinges? They have to go down into the canard.
But first, they needed to be trimmed.
Trimmed hinge and opened slot in canard:
With the slots cut and the hinges trimmed, it was time to bond the hardware into the canard. Filling the slots 2/3 full with wet flox, the hinges were set into the slots and left to cure. After the cure, it was time to install the wingtips. A block of foam was tacked onto the ends of the canard using micro.
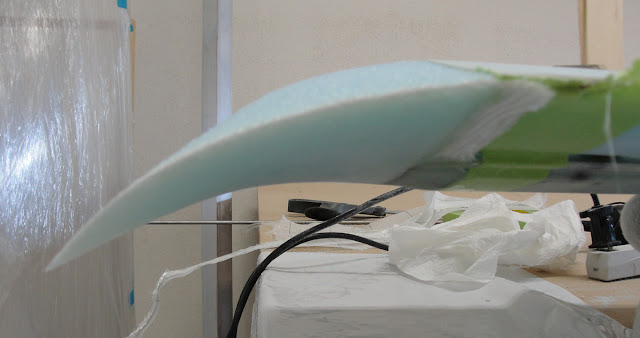
The top surface of the foam blocks were shaped into a pleasing arc.
After matching both tips as closely as possible, the top surface was glassed.
Once that layup cured, the canard was flipped over and the bottom of each wingtip was sanded to shape.
 |
| Nice and swoopy. |
The plans call out for a plastic tube to be inserted in the foam to create a channel for the hinge pin. Instead of running out to the hardware store for this material, Ced opted to use a drinking straw.
The foam around the edges of the tip was removed in order to fillet the edges with micro for stiff tips and a glass to glass bond.
The tips stayed swoopy and are now covered in glass.
Here you can see the alignment of the straw with the hinge pin holes.
The vertical walls of the wingtips received a layer of glass, too.
Now it was time to install the elevator mass balance weights. The purpose of the weights is to balance the elevators nose down. Using jigs, foam and lead is lined up on specified points on the elevator.
They are all bonded together and taped in place.
The elevators needed to be perfectly balanced in order to prevent flutter. Again, I didn't help out with these steps, but I'm sure they were stressful.
In order to install the elevators, notches for the weights had to be cut in the canard.
The bottom skin and foam were removed and the surfaces were micro'd and glassed.
Here you can see the elevator installed on the canard and the weight hanging low.
When the elevator is pitched down, the weight swings up.
And you can see the whole thing in action:


No comments:
Post a Comment